Initial Setup
After installation, “ Insight Assets Backup & Migration “ is available in the “Apps” Drop Down menu.
Only Jira administrator users can access Insight Assets Backup app!
If it is the first time when the app is accessed, you will be walked through the initial Setup process:
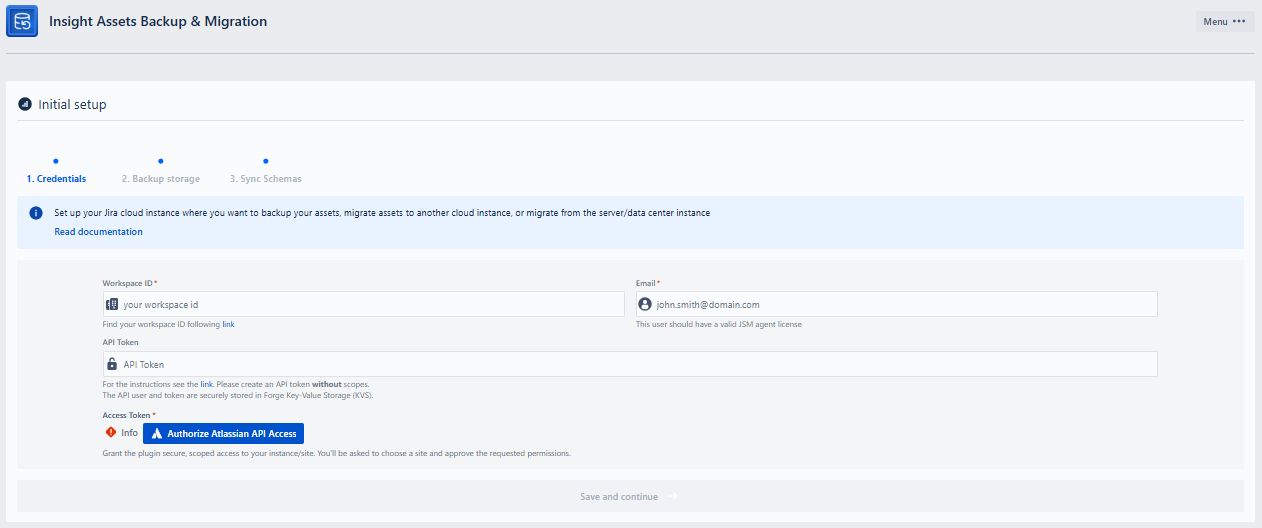
1. Credentials - Token | Email | Workspace ID
For the first step, before creating and configuring individual backup schedules, the following three fields should be filled:
Workspace ID
- Fill in the ID of the Assets (Insight) workspace you want to configure backup for. The Workspace ID can be found on the following link: Backup Configuration. The Jira Service Management REST API uses the workspace ID to identify your individual instance of Assets (Insight), it is an alphanumeric string at the end of the text shown on the opened link with the following sample appearance:
3b3b70g5-66f8-3c01-a2d7-e5bbf2584dc3: - {“size”:1,“start”:0,“limit”:50,“isLastPage”:true,“_links”:{“self”:“https://[yourcloud].atlassian.net/rest/servicedeskapi/assets/workspace”,“base”:“https://[yourcloud].atlassian.net”,“context”:“”},“values”:[{“workspaceId”:“3b3b70g5-66f8-3c01-a2d7-e5bbf2584dc3”}]}
- Fill in the ID of the Assets (Insight) workspace you want to configure backup for. The Workspace ID can be found on the following link: Backup Configuration. The Jira Service Management REST API uses the workspace ID to identify your individual instance of Assets (Insight), it is an alphanumeric string at the end of the text shown on the opened link with the following sample appearance:
Workspace ID is a mandatory field and it should match the Workspace ID of the instance you are installing the app!
API Token
- Atlassian API token secures account access to the API. You can create a token, through the following URL: Atlassian account - API Tokens. You can read more about Atlassian API Token on the documentation page: Manage API tokens for your Atlassian account | Atlassian Support.
- After creating an API Token, just copy and paste it into the corresponding “API Token“ field on the configuration page.
API Token is a mandatory field!
Email
- Fill in the email related to the Atlassian account (valid JSM agent) that will be used to access the data in the Assets. To create and update the schemas, object types and objects, the user should have valid permissions, at least a Manager role in the schema (in case of resting in an existing schema ), or the user should be added to Jira Admin group. Additionally, for restoring objects in issues, the user must have access to the projects/issues where the Asset custom fields are configured and the objects from the schema are selected.
Email is a mandatory field!
After filling the three fields in, click the “Save and Continue“ button. If there is an error in the filled fields, you will see the corresponding error message and link for editing the incorrect information.
If the filled information is correct, you will see the corresponding success message.
If you have IP allow listing enabled on your Jira Cloud, please contact us to receive the required information.
The app is compatible with the Cloud Site Rename feature!
2. Backup storage
For the second step, you have the option to decide where to store the backups. You can choose between Twinit DB and your own Database:
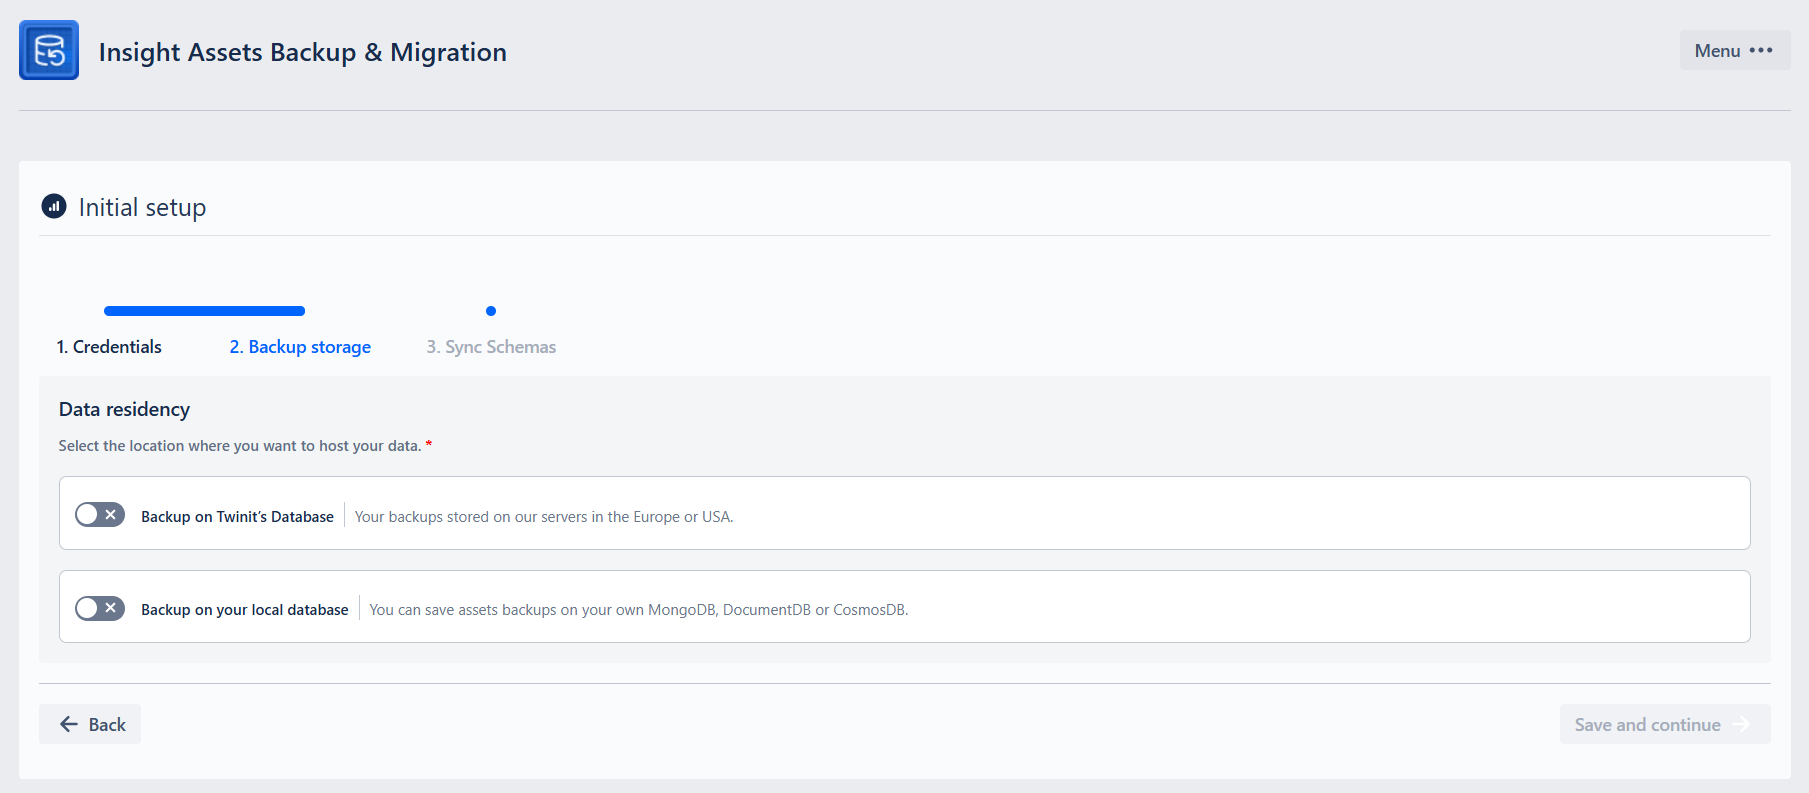
The backups are encrypted on rest and on transfer!
If you choose to store the backup on Twinit database, click the “Backup on Twinit’s Database“ toggle and select the data storage location:
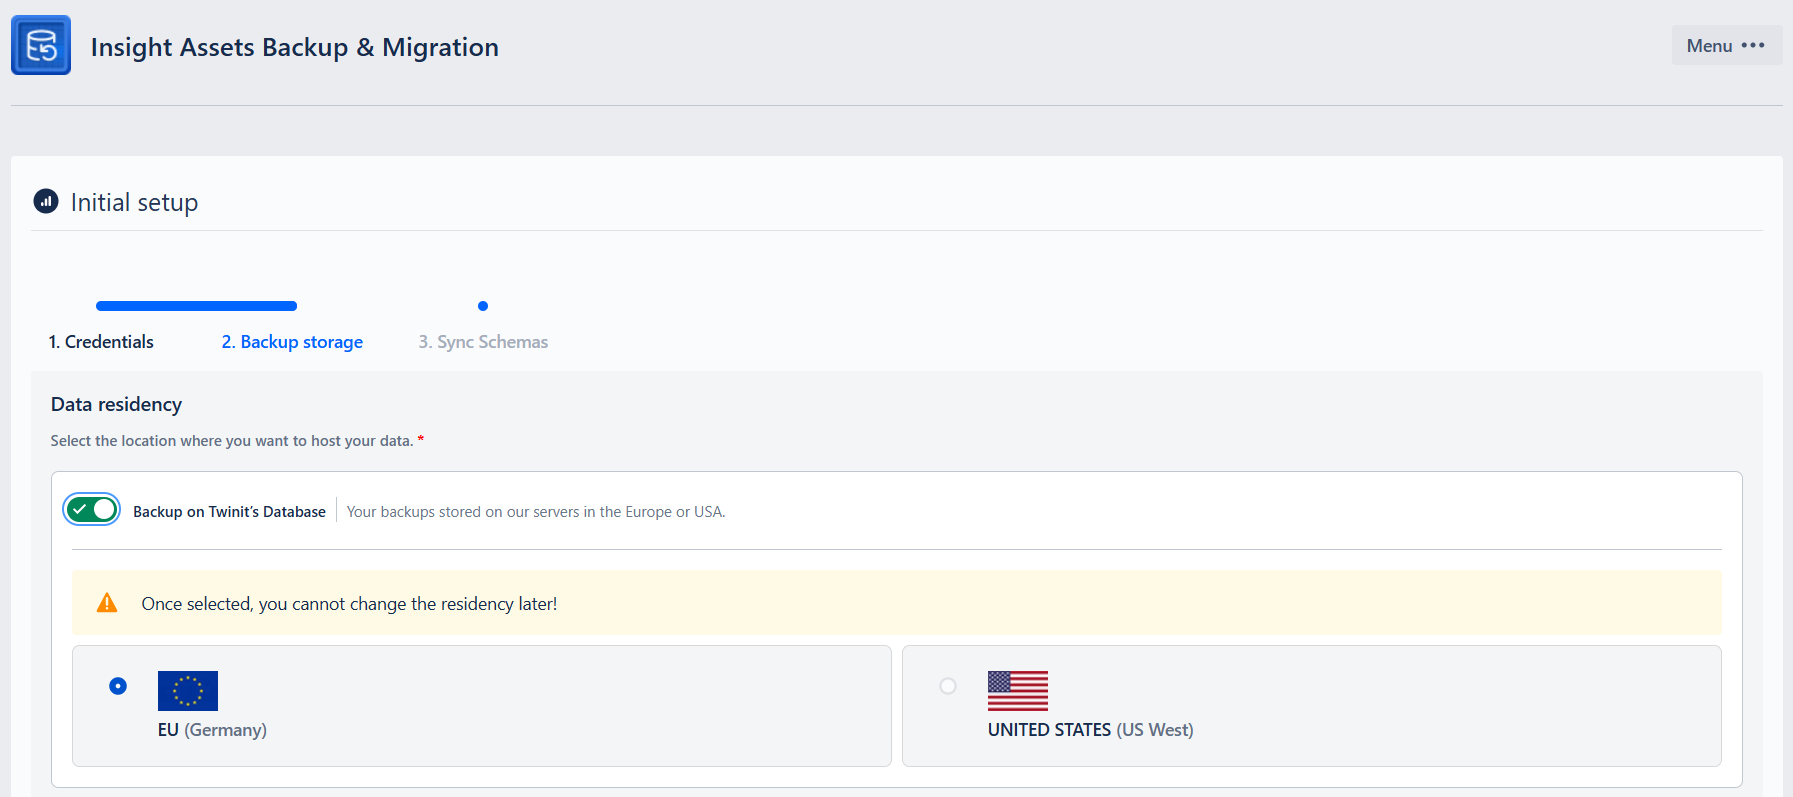
You cannot change the data location later. This means that you cannot change the storage location of the already backed up schemas. However, you can later choose where to store the backups in the future. To do so, delete the connection and during the new configuration select the desired location. In this case, you will see the previous backups, but with an error message “Schema not found in backup“ and you will not be able to restore such backups. If, after selecting US residency, you switch to your own database and later want to switch back to Twinit database, EU location will be selected!
As another option, you can choose your own local database to store the Assets backups:
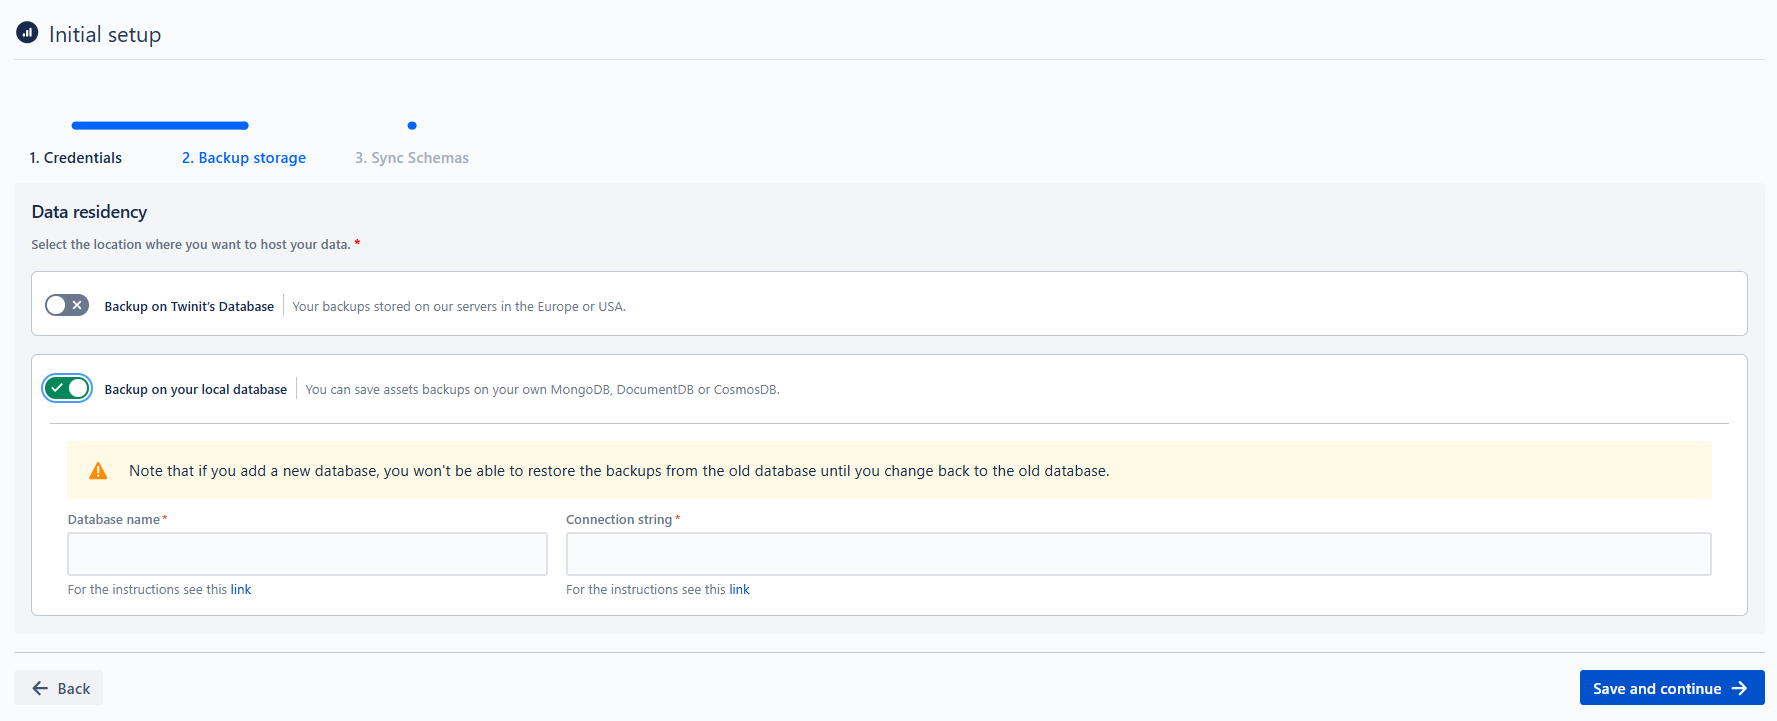
- To activate local DB storage, switch on the ”Backup on local database” toggle and fill in the following data (examples and instructions are given for MongoDB):
- Connection String: read more information about MongoDB connection string here: Connection String URI Format — MongoDB Manual.
- Database Name: follow the following link to find the name of the databases in MongoDB: https://www.mongodb.com/docs/atlas/atlas-ui/databases/#view-databases.
The three possible options for local DB are:
- MongoDB
- DocumentDB
- CosmosDB
If your database is not publicly accessible from the internet, please contact us to receive the required information for whitelisting the app IPs on your server/firewall. The databases will be automatically indexed, improving performance.
After deciding on the database, click the Save and Continue button to proceed to the third step.
3. Sync Schemas
When the backup database is chosen, you will see the Current Connection information and can Sync the existing schemas by clicking the Sync schemas button:
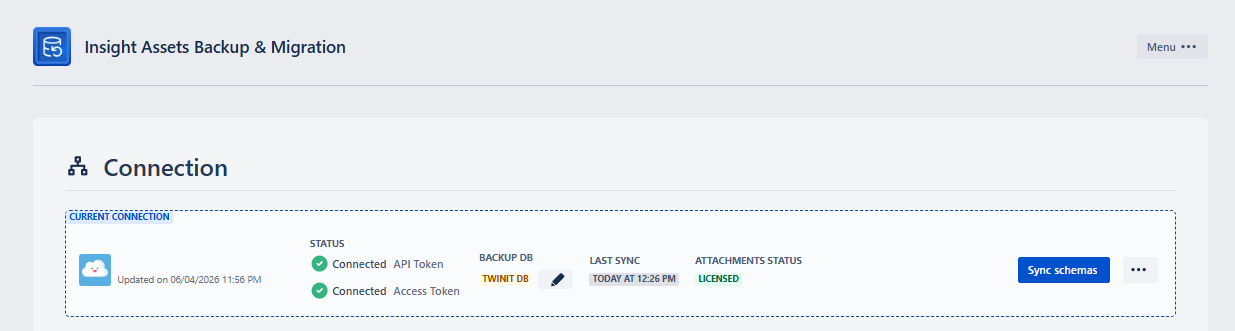
Sync may take up to a few minutes, depending on the quantity of the data in Assets (Insight).
The ATTACHMENTS STATUS shows whether Assets Attachments Backup & Migration app is installed on Cloud and what is the current license status. See Backup and Restore of object Attachments for more details. When the “Sync schemas“ button is clicked, this will also refresh the attachments status.
After a successful Sync, all the retrieved schemas from Assets (Insight) will be displayed:
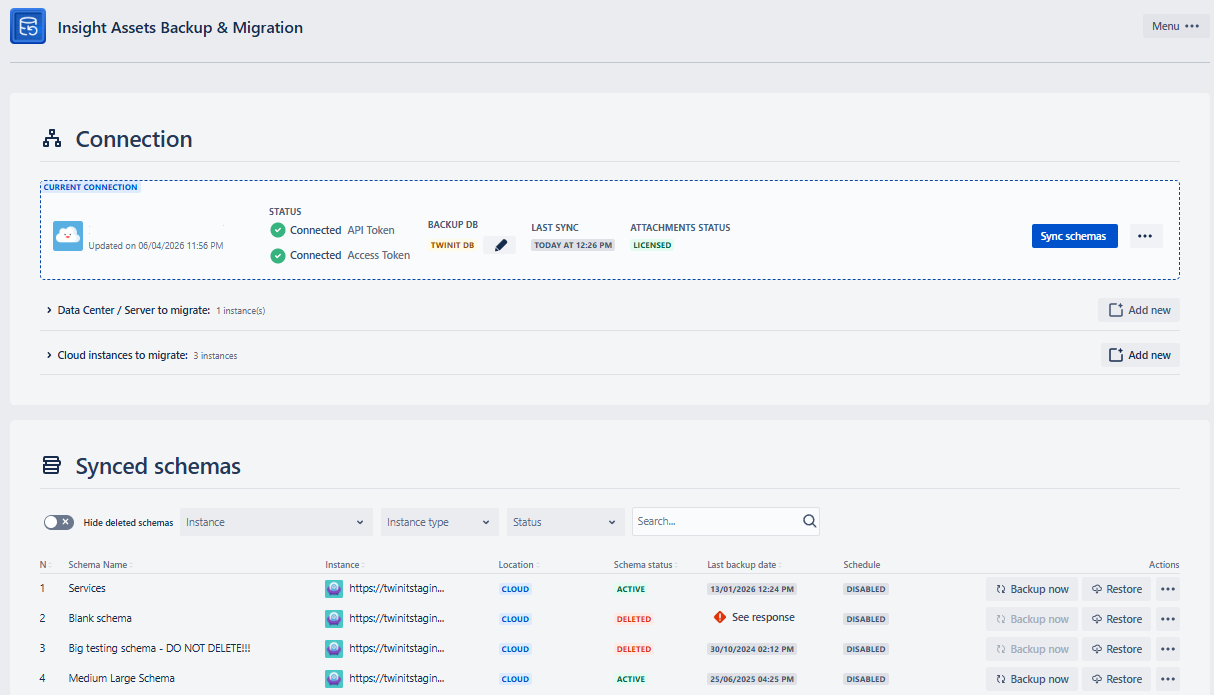
When a schema is created in assets (either manually or by restoring a backup), the schemas must be synced with the app.
Go to Synced Schemas for further details.